
STRUMIS contains a broad variety of reports to fit nearly all circumstances and business needs, however in the event that the information needs to be displayed in a different way, there are a few options available to help to meet this need.
User Defined Reports can be used as a customised approach to this, however as with the selection of Standard Reports the available fields are specific to the module.
In the following example of using User Defined Reports, a report will be created to show the number of Users on STRUMIS and the Permissions allowed by their Role.
To access User Defined Reports:
Locate the Reports subsection of the relevant module in the Sidebar Menu. The example below shows the navigation to System Reports.
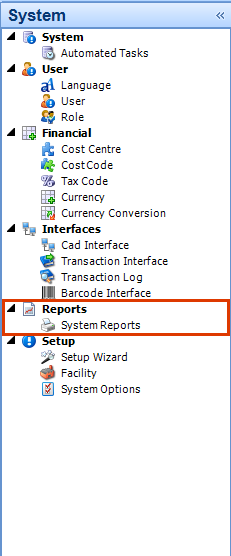
Within the Reports section the User Defined Reports tab can be found towards the top of the page.
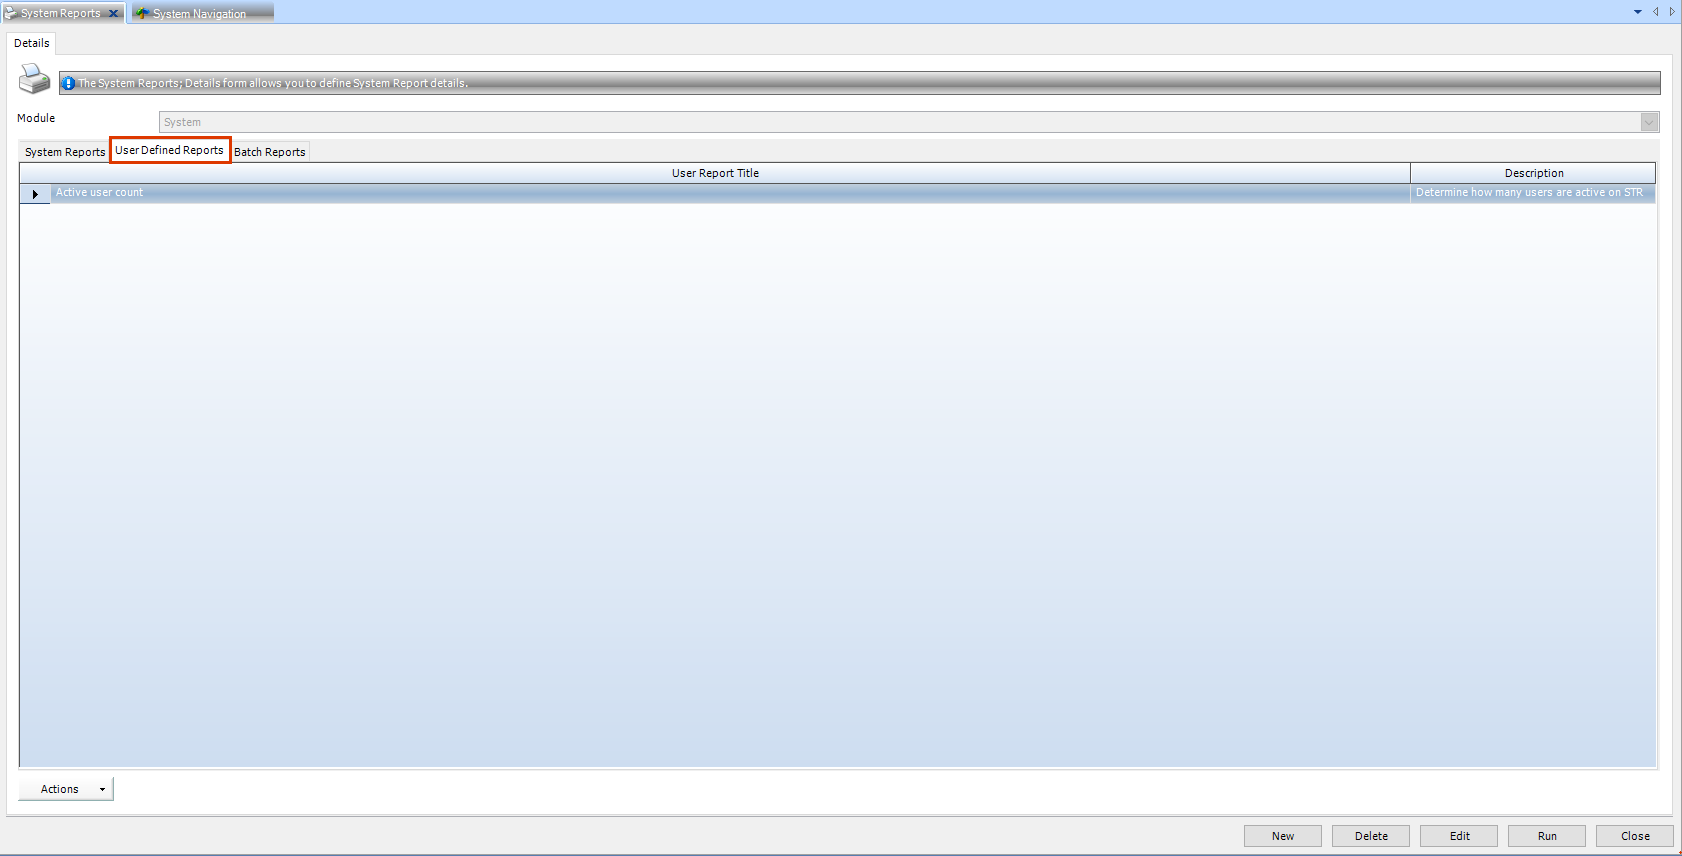
Within User Defined Reports their are a number of different functions available.
Option |
Description |
| Actions | Add to My Reports Add your custom report to My Reports in the Home Tab on the Ribbon.
Remove From My Reports Remove your custom report from My Reports in the Home Tab on the Ribbon.
Clear Report Templates Removes cached data about the report from the database. |
| New | Create a new User Defined Report |
| Delete | Delete a User defined report (report must be selected form the list before it can be deleted) |
| Edit | With the report selected from the list, this will re-launch the User Report Wizard to make adjustments to an existing report. |
| Run | This will run the selected report. |
| Close | Closes down the Reports window. |
To create a New User Defined Report:
Click the New button in the bottom left of the Navigation Window. This will open the User Report Wizard.
Click Next. As you progress through the wizard, the navigation buttons Previous and Next will allow you to move back and forth to amend information as needed.
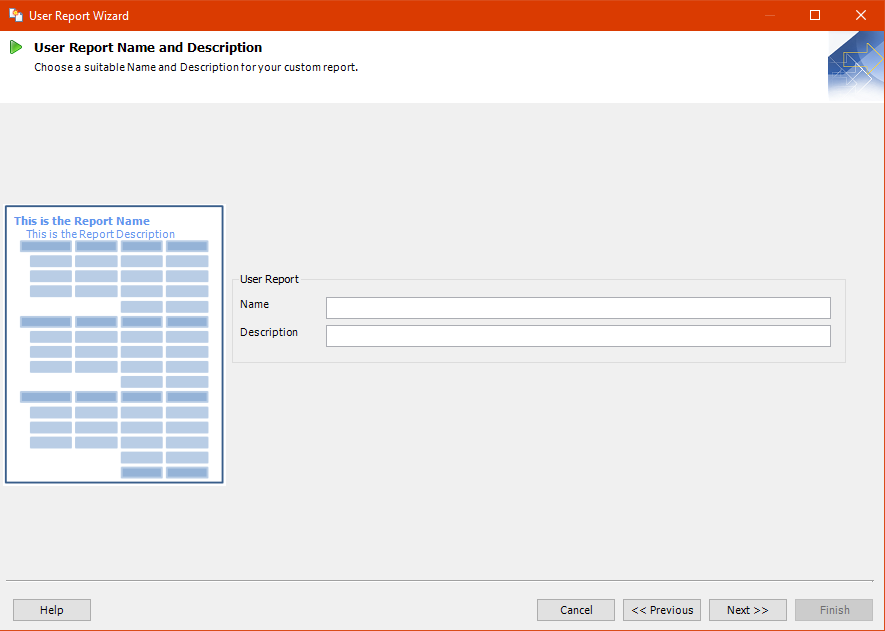
Enter a Name and Description for the report. This is the information that will be displayed at the top of the report.
Click Next to enter the Main View form.
Select the criteria the report will need to run. This will indicate the source records in STRUMIS that will need to be accessed. In this Example we will need User information.
Progressing to the next screen, the Secondary View gives the option to have another criteria to base the report on. This window may appear blank if there are no related modules to the primary criteria.
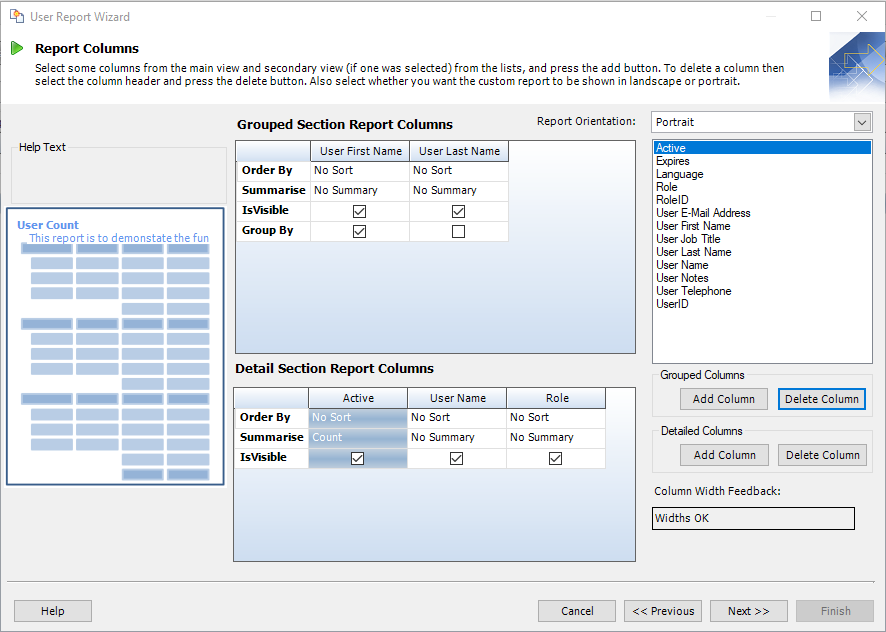
Click Next to move on to the Report Columns screen. Here we can edit the way in which the report appears and the fields that will be needed. The following is a list of the functions
Option |
Description |
| Report Orientation | Change the orientation of the pages from portrait to landscape to best use the space available. |
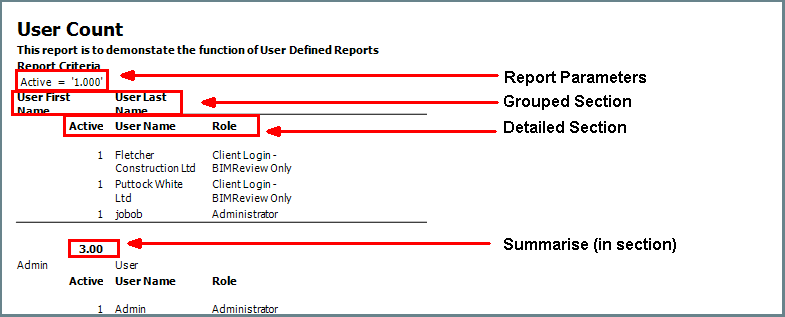
| Grouped Section Report Columns | Primary data source. This will take the place of the headings in the report, "grouping" the detailed data together. In our example this will be the user's names. The data can also be organised using several further options, which can be adjusted independently on each column.
Order By Used to sort data in Ascending or Descending order. If the data is text then the order will be alphabetical. If the data is numerical, the sort will be in numerical order.
Summarise Max, Min and Count, Sum and AVG are all calculations available for use on the columns in the report. As these functions are being used on the Grouped Section, STRUMIS performs a calculation on each separated group on the report and then publishes the result just below the break between each group instance. These figures are then used to calculate the overall figure in the footer.
IsVisible Tick box field to indicate if the information in the specified column is to be seen on the report. Tick to see. Remove the tick to hide.
Group By Tick box field to turn this feature on or off. The grouping can only be applied to one column at a time. This feature will decide how the information will be grouped in the report. For example, If this feature is applied to a column containing user's Active status then this function would group all instances of active users in one block (see example below).
Within this pane the columns can also be re-sized and moved around in the same way that they would in any grid in STRUMIS.
|
| Detail Section Report Columns | This is the secondary data source and shows the detail behind each grouped section. In our example,this will be the user Role, Active and Expires status. This function places a secondary row of headings inside each sub section to indicate the source of the additional data. The data can also be organised using several further options, which can be adjusted independently on each column.
Order By Used to sort data in Ascending or Descending order. If the data is text then the order will be alphabetical. If the data is numerical, the sort will be in numerical order.
Summarise Max, Min and Count, Sum and AVG are also available to use in the Detail Section Report Columns. Only certain Summary calculations can be performed on certain types of data. The data gathered from these calculations is populated in each section and then an overall number is published in the footer of the report.
IsVisible Tick box field to indicate if the information in the specified column is to be seen on the report. Tick to see. Remove the tick to hide.
Within this pane the columns can also be re-sized and moved around in the same way that they would in any grid in STRUMIS.
|
| Fields List | This is located to the right of the form and can be used to search through the possible fields that can be used on the report. This information is populated based on the selections made in Main View and Secondary View. |
| Grouped Columns Add/ Delete | Two buttons beneath the fields list. These buttons can be used to place the chosen field ( highlight in the Fields List then press the Add Column button) into the Grouped Section Report Columns or remove unwanted fields. |
| Detailed Columns Add/ Delete | Two buttons beneath the Grouped Columns buttons. These buttons can be used to place the chosen field ( highlight in the Fields List then press the Add Column button) into the Detailed Section Report Columns or remove unwanted fields. |
| Column Width Feedback | As more columns are added to the report, this keeps track of the available space, which is dependant on the Report Orientation selected. If the columns exceed the space available, this tool will provide an alert showing how much by. If the columns on the report are within acceptable parameters, this will read Widths OK. |
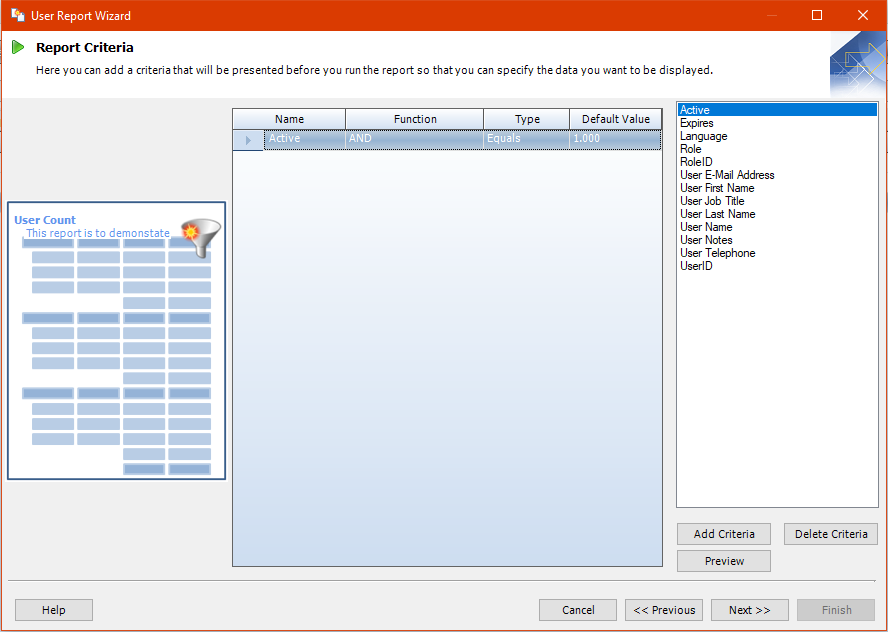
Click Next to move onto the Report Criteria. On this screen the parameters to search the report are set.
Option |
Description |
| Fields List | This is located to the right of the form and can be used to search through the possible fields that can be used as search parameters on the report. This information is populated based on the selections made in Main View and Secondary View. |
| Add Criteria/ Delete Criteria | Add or remove a highlighted selection from the Fields List to the Criteria Pane n the middle of the form. |
| Preview | Shows a popup window with a demonstration of the chosen criteria in action. |
| Report Parameters Pane | This shows the chosen parameters and the constraints that will be used to filter the data to be used to generate the report. Functions on this screen include:
Renaming Parameters Any chosen Parameters selected can be renamed to accommodate any variations that may be needed. This does not change the type of data that has been chosen from the database to search.
Function Choose from OR, AND or NOT to sort the data by. The chosen function will control the relationship between the Name and the Type field. Once these are selected however, they cannot be changed when running the report.
Type Choose from Equals, Greater or Equal than, Less or Equal than, Greater Than or Less Than for numerical entries. Choose from Equals, Like, Starts With, Ends With or Contains for any field that contains Alpha data.
Default Value This function allows you to set a value which you know will occur a great deal to save time during each run of the report. |
Click Next once the report criteria has been entered to access the Finish Report screen.
Next, choose to Run the Report when the Wizard Finishes and/ or Add the Report to "My Reports".
By selecting to run the report, once the Finish button has been clicked the wizard will close and the report will open to the Report Parameters screen. From here the Default Value can be adjusted and the report can be run.
By selecting to Add the Report to "My Reports", it will be stored in the My Reports menu in the Ribbon for quick access. The location to find the report in My Reports will depend on the associated Module.
Below is an example of the report setup with User Defined Reports.
 Group by