
Use these instructions to add a mark to a drawing.
On the Contract Detailed Listing - Details form:
1. Select the drawing to which you want to add a mark.
2. 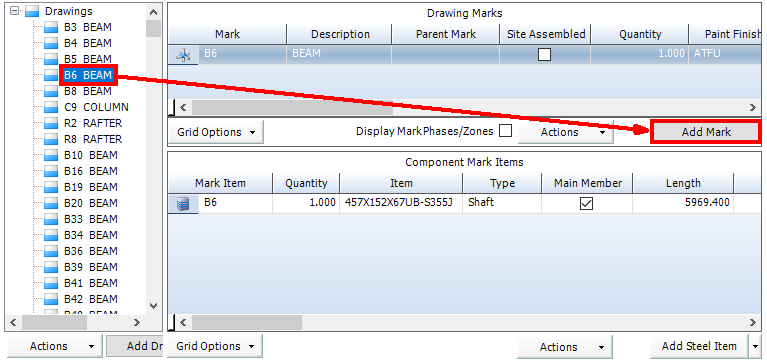
3. Click the Add Mark button.
The Detailed Listing Mark form is displayed:
4.

5. Complete the fields on the form using the following information:
Mark tab fields
Field |
Description |
MarkID |
Automatically populated. |
Mark |
Type in a name for the mark that is associated with the drawing it is to be added to. |
Description |
Select a description from the drop down menu. If a description you require is not available, use the Ellipsis button to open the lookup form to add another into the free text field. |
Is Assembly Mark |
Select this check box if this is an assembly consisting of multiple child marks. The Site Assembled check box becomes available. The Parent Mark field becomes unavailable. If this mark is not an assembled mark, the Parent Mark field is available and you can select a parent. If you make this an assembly mark, when you access another mark, you will be able to find it in the drop down list for the parent mark.
See Detailed list terminology for more information. |
Site Assembled |
Select this check box if the mark is an assembly mark and is to be assembled on site. This is only available if the Is Assembly Mark check box is ticked. |
Parent Mark |
If this mark is a child mark of a larger assembly, select a parent from the drop-down list. |
Quantity Total Quantity |
Specify the quantity of the mark that is required. If the mark is a child mark, the quantity is multiplied by the quantity of the parent to give a total quantity. |
Paint Finish |
Select a paint finish from the drop-down list or click the ellipsis button to create a new one. |
Execution Class |
Select an execution class: 1, 2, 3 or 4. |
Coverage Factor |
If this mark requires a paint finish, specify a coverage factor here. This is a multiple of the actual amount of paint that is required. It is used to account for wastage. STRUMIS automatically applies a multiple of 2 by default. |
Create Production Work Order |
Select this check box if you wish to track the mark through Production Control. |
Receivable into Inventory |
Use this to flag if the mark is to be fabricated and then stored in your Inventory for future use. When you set the flag, an extra field is displayed, where you must specify the code, size and grade for the section that you want to receive into Inventory. When you finish creating the Detailed Listing, you will go on to create a work order for the mark. The work order is progressed through production and the fabrication of the mark is completed. At this point, you can receive the completed mark into Inventory using a Receive From Work Order transaction. See About Receive From Work Order. The new Inventory item has the same length and width as the mark's main member. You might use this functionality, for example, to fabricate a plate girder and receive it into the inventory as a single item. |
Phase Quantities grid
Specify which phase(s) the mark should be assigned to. When you return to the Contract Detailed Listing - Details form, in the list of marks, you can view the phases for each mark. To do this, select the Display Mark Phases/Zones check box.
Revision History tab
This tab shows details of any changes made to this mark or its mark items after it has been lotted.
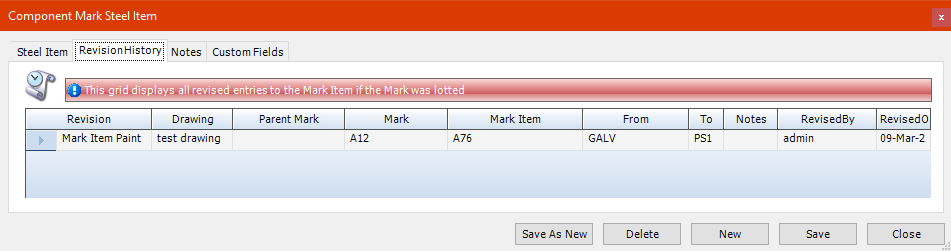
|
If you are attempting to revise a mark without a lot the revision will not appear in this tab. Continue to Production lotting to lot the mark before processing a revision. |
Notes tab
Use this tab to add notes for the mark.
Custom Fields
Add additional fields here to add further information not already available on the form. For more information see define Custom Fields for a record.
6. Click Save.
The mark is added to the list for the selected drawing.