
Use this form to maintain your facilities.
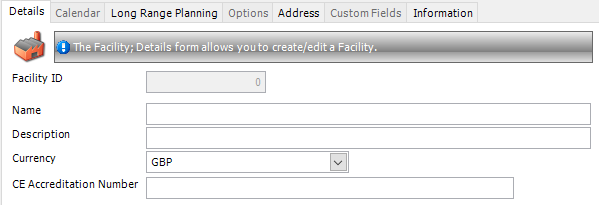
In the Details tab, the facility will be named, the currency indicated and the CE Accreditation Number specified.
As the image below indicates, there are certain tabs that will not be available until the facility has been Saved.
Field |
Description |
Name |
Give your facility a name. |
Description |
This is a free text field where you can type in more details about the facility |
Currency |
Select a currency from the drop-down list. |
CE Accreditation Number |
If you do business within the European Economic Area, you may have a CE accreditation. If this is the case, you can enter it here.***does it affect something else? |
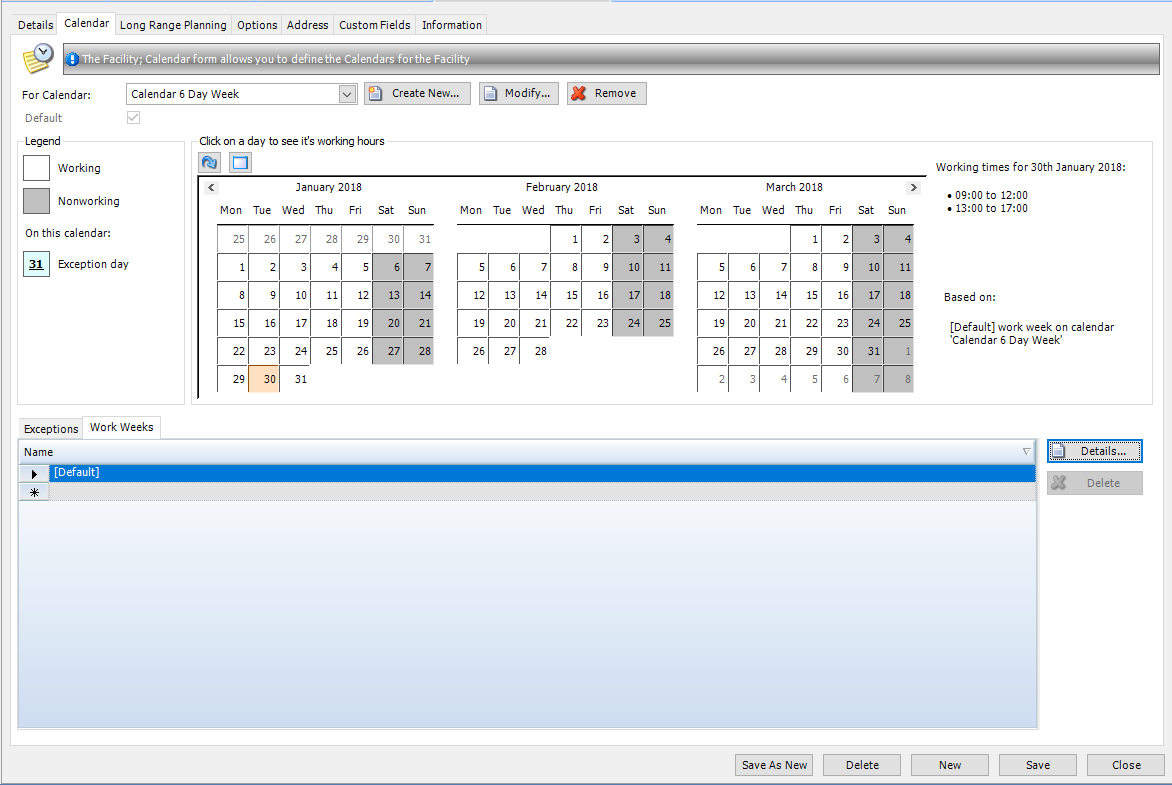
If the facility has been Saved, this tab will be available.
When accessing the calendar tab for the first time, the Create New button will be lit up ready to add a new calendar to this Facility. If you have already created a calendar for this Facility, then this will be shown automatically upon accessing this tab.
To create a new calendar, follow these steps.

If the calendar is to be based on one already in the system then select from this from the drop down list. If not, proceed to Save the new calendar. The calendar form will be populated.
Field |
Description |
For Calendar |
Drop down menu allowing you to select any existing calendars to make adjustments within this form. |
| Create New | Create a new calendar. |
| Modify | Opens the Modify Calendar form to allow changes to the calendar name and code. |
Remove |
Delete the calendar from the system. This cannot be undone. |
Legend |
This is the key to explain what is being shown on the calendar illustrations. This includes Working, Nonworking and Exception days. |
Calendar visual |
Visual representation of the Work Week selected. By clicking on a day, the details beside will be updated to represent the selection. the Based On heading shows which work week is being displayed. |
|
Located just above the calendar visuals, this button opens a new window that allows you to search the calendar for a specific date. |
|
Located just above the calendar visuals, this button will find today's date and select it on the calendar. |
In the bottom half of the form, select the Work Weeks tab. This is where different types of work week can be created. If you only wish to use the Default calendar, select this and click details.
If you wish to create a new Work Week, select a new line and enter a name. If a new Work Week is created, the calendar visual guide in the top half of the form will display the new information.
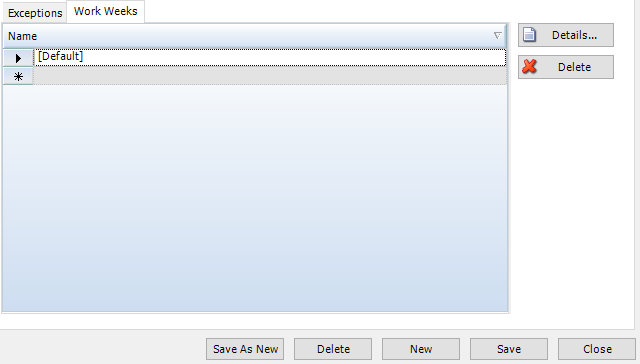
Select the chosen Work Week from the list and click the Details button. This will display the details form.
Field |
Description |
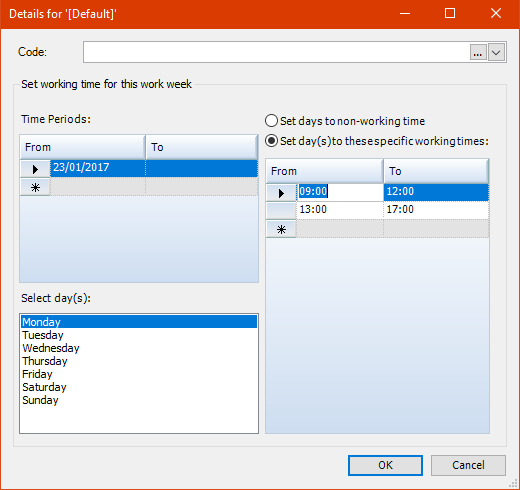
Code |
Shorthand designation that can be used to describe an element in STRUMIS that does not require the entire name to identify the record. |
| Time Period | Set date range for the working week to be applied to. For example, if the chosen work week is only applicable to the next six months, then the date range can be set to reflect this and the next template can be set to start on its completion. |
| Select day(s) | Choose a day from the list to select the working hours or set the day to non-working time. Multiple days can be selected at once using SHIFT or CTRL and clicking on the required entries. |
Set days to non-working time |
With day(s) selected and this option applied, any days in range will be classed as non-productive on the calendar and the working hours field will be greyed out. |
Set day(s) to the specific working times |
Select the relevant days and choose this option to indicate the working hours for them. |
Once all the desired changes have been made to the Facility Calendar you should Save the record before continuing. This is done in the usual way. See Work With Forms.
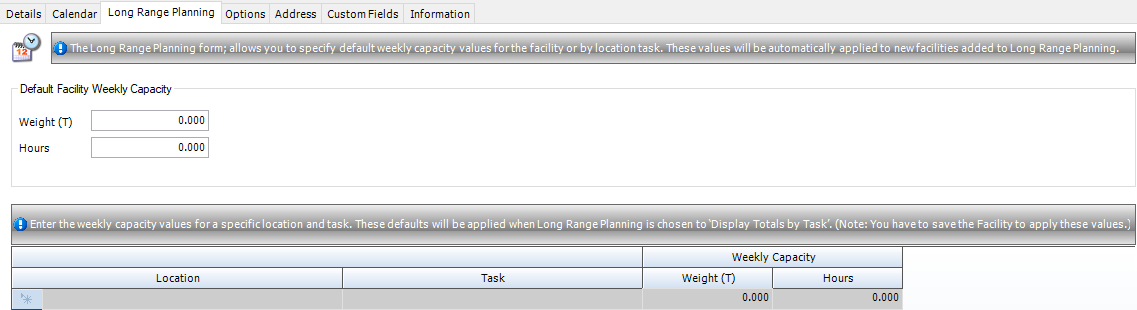
The long range planning form is used to enter the information pertinent to the weekly capacity of the facility in hours per chosen weight unit. This can be entered as an overall capacity or broken down to specific tasks and locations within the facility.
The functions available are as follows>
Field |
Description |
Default Facility Weekly Capacity |
Enter values equal to the facility weekly production capacity. The Weight value will change depending on the weight Units selected on the Ribbon. |
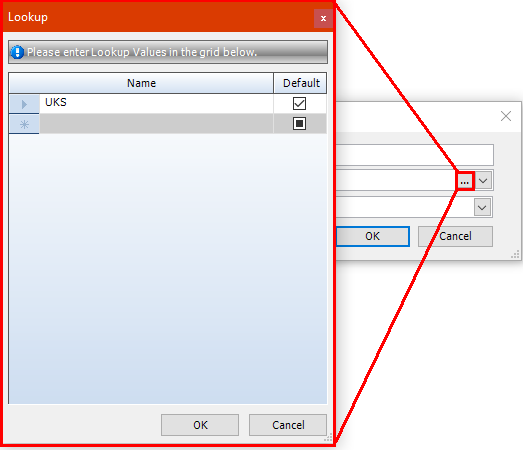
| Location | This is associated with the weekly task breakdown. You can add a task's location from the drop down menu or add a new one using the Ellipsis button. This will open up the Location form found in the Items and Inventory module, which is where this information is sourced from. |
| Task | Select a task that will contribute to the Weekly Capacity once it has been completed. If you would like to select a task that cannot be found in the drop down menu, use the Ellipsis button to add a new entry to the list. There is also the option to select a task as a default. |
Weekly Capacity |
This is broken down into two headings. The unit weight generated from the task and the hours to complete it. Both these fields require manual entry. |
|
To delete a record within the weekly task breakdown, select the line using the icon to the left in the margin and then press Delete on your keyboard. You will then be prompted to verify this action. If you delete a record and click yes to verify, then it cannot be restored. |
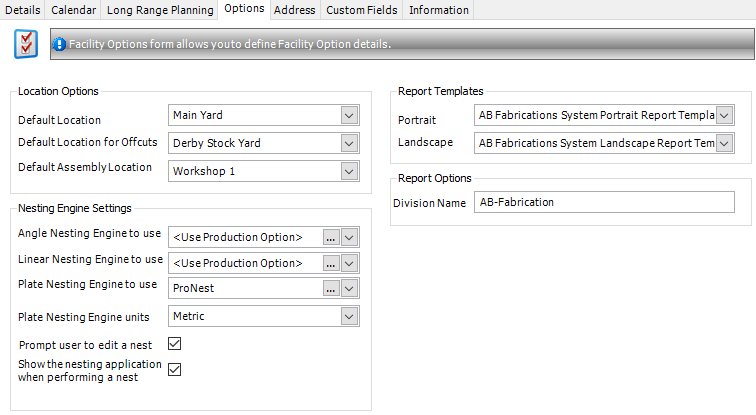
The options form identifies the default settings for the chosen facility that will be used in the day to day operation of STRUMIS. It is broken down into three major groupings. The Location Options, Nesting Engine Settings, Report Templates and Report Options.
These settings will bridge numerous different modules in STRUMIS. For example, a report run in production, will still use the same basic report template as a purchase order.
By making these settings facility specific, a company can work within the constraints of each independent facility in their organisation.
Field |
Description |
Default Location |
Drop down menu providing the option to select from any entry in the Location form found in Items & Inventory. This is the location that will appear first when the associated facility is selected. |
Default Location for Off cuts |
This location specifies where off cuts will be sent to, and appears first when an off cut is to be processed. |
Default Assembly Location |
The primary location where the assembly process will take place. When designating an assembly location, other options will still be available. |
Nesting Engine Settings
Field |
Description |
Angle Nesting Engine to use |
Select the nesting engine that can be used for any of these cut types. This will be specific to the software available to you, however STRUMIS has a Default Nesting Engine built in which is designed to handle all of these different material types. There is also the option to Use Production Option which will ask which nesting engine you require when you are starting a nest. |
Linear Nesting Engine to use |
|
Plate Nesting Engine to use |
|
Plate Nesting Engine Units |
Specify Metric or imperial units of measure to use with the nesting engine. |
Prompt user to edit a nest |
If you are using a 3rd party nesting engine, this option will ask the user to verify the nest before accepting it. In this process, the 3rd party engine will open and display the proposed nest as designated by STRUMIS. This can then be adjusted before returning to STRUMIS to verify. |
Show the nesting application when performing a nest |
If you are using a 3rd party nesting engine, progress of the nest will be shown within this application. |
Field |
Description |
Portrait |
Select the template that will be used when Portrait oriented reports are run from this facility. The report template contains the company logo and any additional information that will be standard across any report ran. |
Landscape |
Select the template that will be used when Landscape oriented reports are run from this facility. The report template contains the company logo and any additional information that will be standard across any report ran. |
Field |
Description |
Division Name |
This is the name that will appear on the top of reports that are run from the designated facility indicating where the data originated from. |
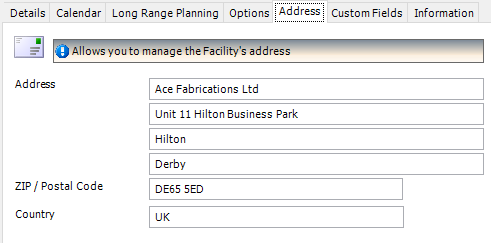
In this tab, the address for the facility will be entered. This will be used in lots of different modules in STRUMIS, including the delivery and invoice address. Using the example of Purchase Orders, the displayed address will be associated with the facility that it was created against.
This behaves in the same way as Custom Fields in other areas of STRUMIS. For more information see define custom fields for a record.
For details regarding this, please see View basic information about a record.